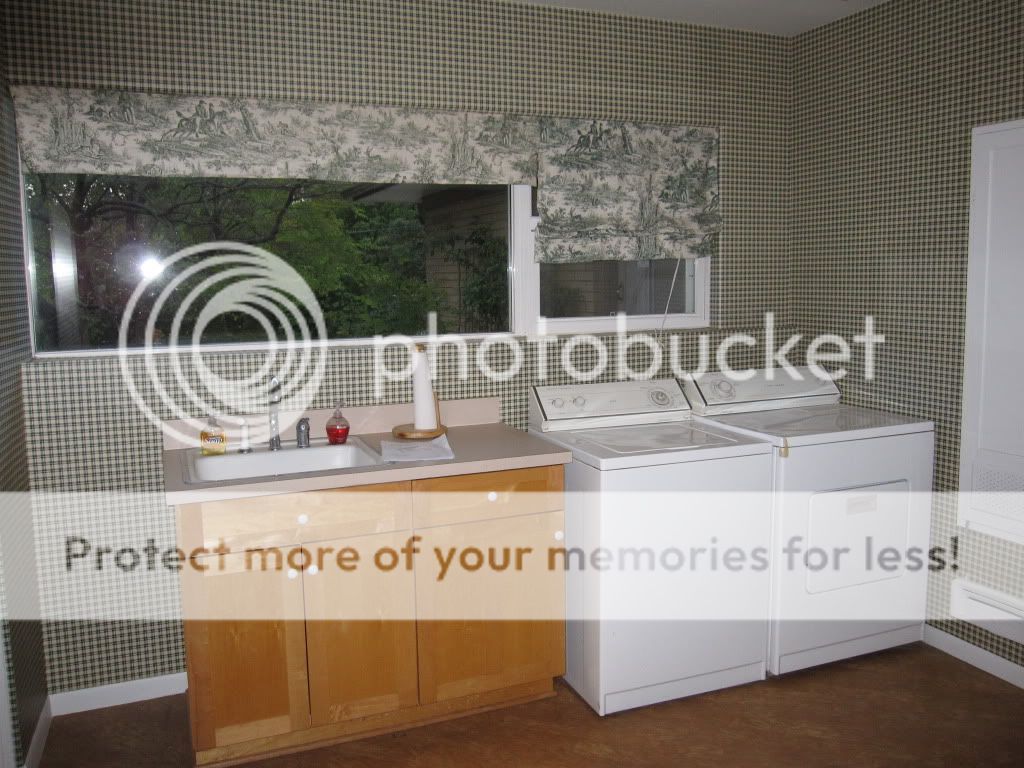
First thing’s first: wallpaper. I’m convinced that Satan’s lair in hell is lined with thick, well-glued wallpaper in festive patterns. Our charming 1950s ranch features wallpaper in three rooms – cream/ hunter green checkers in the laundry room/office:

Green toile (no, seriously…I can’t make this stuff up) in the kitchen:

Blue green stripes in the bathroom (which also features a non-working aqua sink with matching toilet and tub):

All three wallpapers are equally hideous (though the toile holds a special place in our hearts) and are all glued on with the same thing Donald Trump uses to keep that hair in place.
In short – I HATE WALLPAPER AND WANT IT TO DIE A SLOW DEATH. No, make that a fast death so that it will get the heck out of my life FOREVER.
Yes yes…I know that designers are trying to tell us that wallpaper is back in style! So many amazing patterns! The perfect accent for your wall!
THEY ARE LIARS. They don’t tell you about what it takes to get that crap OFF your wall. Don’t be fooled. To take down wallpaper:
- First, invest in a steamer. We’re told Home Depot might rent them but for about $70 at Costco (or $99 on their web site) you can get a Tobi Steamer
that you can later use on clothes, drapes, to give yourself a cheap facial, etc.

- Lay down some drop cloth. Seriously, take it from us. Spending hours scraping crusted glue off your floors is no fun. COVER YOUR FLOORS. You’ve been warned.
- Score the area you want to remove using a specially made wallpaper scorer. It looks almost like a computer mouse but with little teeth underneath. And those teeth are sharp. Do not rub this on your arm to test the sharpness…again, trust me on this one.
- Crank the steamer and hold it up close to your wallpaper – move slowly up and down until you have a good area covered. (remember that steam rises so start low and end high)
- And now start picking. Oh yeah – pick like you’ve never picked before. Slowly but surely it’ll start coming off. And I do mean SLOWLY.
- Now take a break to curse the day wallpaper was invented.
- Okay, back to work. What? Did you think you were done? No chance. Suck it up – this was YOUR idea.
- Once you have the first layer off it’s time to get the glue off. Spray the wall with a wallpaper remover spray or gel. We used Piranha Wallpaper & Paste Remover
and it worked well on our bionic wallpaper and all the forces of evil working against us.
- Use a sponge to spread the remover all around (they sell special wallpaper sponges at Lowes and Home Depot but you can probably use any sponge or cloth – you’ll want something with a slightly abrasive side and a smooth side).
- Pause to wonder why you didn't just hire professionals to do this.
- Time for scraping. Lowes and Home Depot sell special wallpaper scrapers that are worth the money – they have a scraper on one side and a wheel in the other so it’s easy to run it up and down the wall to scrape off the glue. At this point in the process you’re pretty sure your arms are going to fall off so every little bit helps. Spend the $10.
- At this point you’ve probably got most of it off but not all of it. And you need to get all of it off if you want your paint to go on smoothly later. So don’t be lazy – as my grandma would say, “a lazy man does twice the work.” Spray it down again but this time use the abrasive side of the sponge to rub off the remaining glue. Then wipe down the wall with the smooth side of the sponge.
- Once you have all the paper off, let it dry and sand down any chunky or rough pieces using regular sand paper or an electric sander if that’s how you roll.
- Okay, here’s the part that sucks. (because the other part didn't suck enough) Just when you think you’re done you have to prime. DO NOT waste your time trying to paint without priming after wallpaper removal. It will suck up the paint and look like crapola. Prime well and it’ll save you a lot of money in paint and therapy bills.
I know it’s a pain but the end product is so worth the back ache. I'll post before and after pictures once I've cleaned up a bit - something about having plaster and dust all over your floors that takes away a little of the magic.
For now we'll just rejoice in the fact that we're wallpaper free. A little delirious and high off the smell of wallpaper glue remover spray, but good:

No comments:
Post a Comment